Sunday, 8 May 2011

Bulkhead Removal Bar - Fitting Part3


After removing the old bulkhead, I filed all the edges smooth - primed and painted them with satin black Hammerite.  This should make the edges of the metal less visible.


It was then just a matter of drilling some holes in the cappings and wheel boxes and fitting the bar.

Sound simple when you say it quickly.  To be honest, drilling the holes upwards through the cappings and fitting those bolts was very fiddly and much swearing was done.  This would have been much easier with the roof off.


The finished result...


Conclusions...
The seating position is much improved and I am very happy with that.

However, it was much more awkward and time consuming to fit than I expected.  If I were to do do it again, on a rolling restoration like mine, I would fit a Mud style bar.  The only time I would fit a tubular bar in the future is if the roof was off or if I was restoring a tub off the vehicle.

Do you yourselves a favour - if you need more legroom fit a Mud style bar!

Thursday, 5 May 2011

Bulkhead Removal Bar - Fitting Part2

All right I'm not the fastest at this sort of thing but this is is taking longer than I expected.

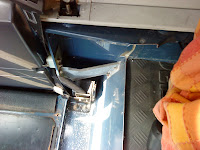
The centre section of the bulkhead is now gone.  Removing the side section required careful use of a hack-saw blade.


I then removed the protruding sections of capping with my trusty hack-saw.

I expected this to be awkward given the confined space, however, it turned out to be relatively easy.

Tuesday, 3 May 2011

Bulkhead Removal Bar - Fitting Part1

OK so I have finally got round to fitting the removal bar that I bought a few weeks ago on ebay.

On removing the seats the bulkhead is visible in all its glory.


The first step is to drill out the rivets and remove the bulkhead top rail.  I covered the rear seats with an old curtain (in this rather fetching shade of orange) so as to keep sharp bits of swarf out of the fabric.


After removal of the rail...


I then cut out the centre section of panel.


I started off using a hacksaw and drilling a line of holes....


Thankfully a neighbour came to the rescue (thanks John) and lent me his sander thingy with the metal cutting attachment.

This made short work of making the necessary long straight cuts.